WordPress is an incredibly powerful and flexible content management system. However, its true potential lies in the strategic use of plugins. While the vast WordPress plugin directory offers tens of thousands of existing solutions, there comes a point when these options don’t suffice.
Whether you require a unique functionality, need to upgrade existing plugins, or want complete control, WordPress plugin development becomes crucial. This comprehensive guide will walk you through the essential steps to develop professional WordPress plugins. It will cover fundamental concepts, core functionality, and best practices to empower you to extend WordPress.
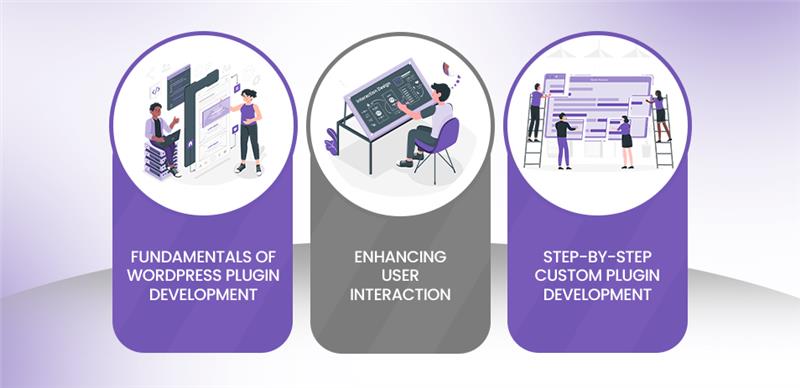
Fundamental Concepts of WordPress Plugin Development
The essence of plugin development lies in understanding how WordPress functions and, crucially, how to interact with it. It is paramount because every update overwrites its core, meaning any direct alterations would be lost. It follows a fundamental principle: any custom functionality or modification you add to a WordPress site should be via plugins.
A plugin typically has one or more functions defined in PHP files, as PHP is the primary scripting language powering WordPress. However, beyond simple PHP functions, plugins leverage some key components to integrate within the ecosystem: hooks, shortcodes, and widgets. These elements form the backbone of effective WordPress plugin development.
Hooks – The Foundation of Interaction
Hooks allow developers to “hook into” or manipulate a process at a specific point without ever altering the core WordPress files. They provide a safe and standardized way for your plugin’s code to attach to the working WordPress core. They enable functions to execute at various predefined points in the system’s execution flow. There are two primary types of hooks:
Action Hooks
An action hook allows you to trigger your custom functions at specific, predetermined points in the WordPress execution flow. Think of them as event listeners. For instance, when publishing a post, an action hook can trigger a function that executes a particular task. It includes sending a notification email to subscribers, logging the event, or updating an external system. To work with an action hook, you use the add_action() function. Its basic syntax is add_action(‘hook_name’, ‘your_function_name’);, where hook_name is the name of the action hook provided by WordPress. ‘init’, ‘wp_head’, ‘save_post’ are examples, and your_function_name is the name of the function you want to execute when that hook fires.
Filter Hooks
Unlike action hooks, filter hooks modify or manipulate data before it is used by WordPress or sent to the database. Filters give developers the ability to alter text, content, or other data, effectively changing default WordPress behavior or data. Similar to action hooks, you attach your custom functions to a filter hook using add_filter(). The key difference is that your function, when hooked to a filter, must accept at least one parameter. It means that it should always return a modified version of that data.
Incorporating Plugin APIs
In addition to hooks, WordPress provides various Plugin APIs, or Application Programming Interfaces, that offer extended functionalities for development. These APIs enable you to interact with different aspects of WordPress in a more structured and powerful way. For example:
Settings API
Essential for creating custom settings pages in the WordPress admin area, allowing users to configure your plugin’s behavior.
REST API
For interacting with WordPress data, programmatically using standard HTTP requests, enabling headless WordPress setups, or complex external integrations.
Shortcode API
The backbone for creating custom shortcodes, which we will discuss later in this blog post.
Customizer API
For adding options and live previews to the WordPress Customizer, allowing users to modify certain aspects of a plugin’s output in real-time.
Expert Advice
By skillfully combining the use of hooks and these powerful Plugin APIs, developers can create complex, integrated, and user-friendly functionalities. The plugins significantly enhance both efficiency and capability without ever needing to touch WordPress core files. Complex API integrations often require specialized expertise. If you need help implementing intricate REST API functionality or other deep API work, hiring professional API developers is crucial.
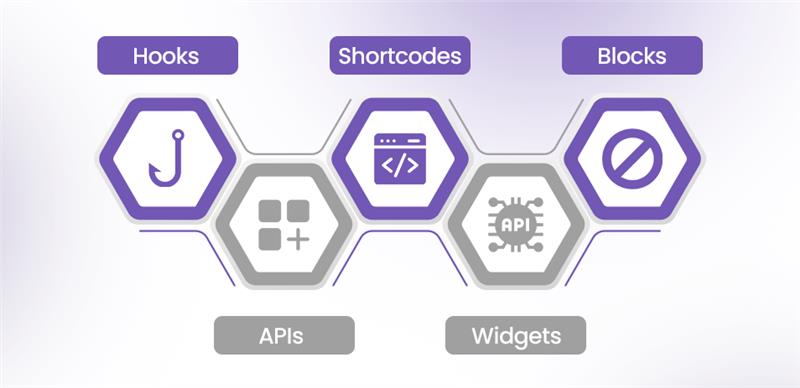
Enhancing User Interaction: Shortcodes and Widgets
Shortcodes, widgets, and blocks are tools for enhancing how users interact with and display your plugin’s content on their website. The following are the details on each one of them.
Shortcodes: Dynamic Content Insertion
When you develop a plugin, it does not inherently have direct access to or control over the WordPress theme’s visual output. Shortcodes allow users to display dynamic information or complex functionalities from plugins within their posts, pages, or custom post types. They are small, bracketed tags (e.g., [my_custom_shortcode]) that users can insert directly into the WordPress editor. While rendering pages or posts, WordPress processes shortcodes and replaces them with the dynamic HTML output of the plugin’s PHP function.
This mechanism allows users to embed complex elements, such as contact forms, image galleries, data tables, or custom content. Shortcodes can also accept parameters, allowing for even greater customization by the end-user.
Widgets: Flexible Sidebar and Footer Content
Widgets provide developers with another way to display their plugin’s content to the end user. It typically shows in predefined ‘widget areas’ within the WordPress theme, such as sidebars, footers, or custom template regions. WordPress offers a dedicated PHP class, WP_Widget, which you must extend to create a custom widget for your plugin.
By extending WP_Widget, you define the widget’s appearance in the admin area, its front-end output, and any configuration options. It allows theme designers to provide flexible areas for content, and plugin developers to offer easily placeable dynamic content. Classic examples would be a “Social Media Feed” widget or a “Newsletter Signup” widget, powered by the plugin’s logic.
Blocks: The Modern Gutenberg Integration
With the advent and widespread adoption of the Gutenberg editor, blocks have fundamentally transformed the creation and management of content. In Gutenberg, every piece of content, be it a paragraph, an image, a button, or a custom element, is treated as an individual ‘block’.
By developing custom blocks, plugin developers can create solutions that integrate seamlessly and natively with the Gutenberg editing experience. This paradigm shift offers immense freedom to design these blocks in a way that perfectly matches their functionality and user experience. Developers can include a wide array of options and settings directly within the block’s sidebar controls. It allows users to customize elements like text alignment, background colors, inclusion of images, or dynamic data sources within the editor.
Building custom blocks often involves using modern web development technologies like React and JavaScript alongside PHP. It allows for highly interactive and dynamic editing experiences directly within the post editor. This modern approach is crucial for developers aiming to provide the best user experience in the contemporary WordPress ecosystem.
Step-by-Step Custom Plugin Development
Now that we have covered the foundational concepts, let’s dive into the practical steps of creating a custom WordPress plugin. Following these steps will help you build a professional, maintainable, and robust solution.
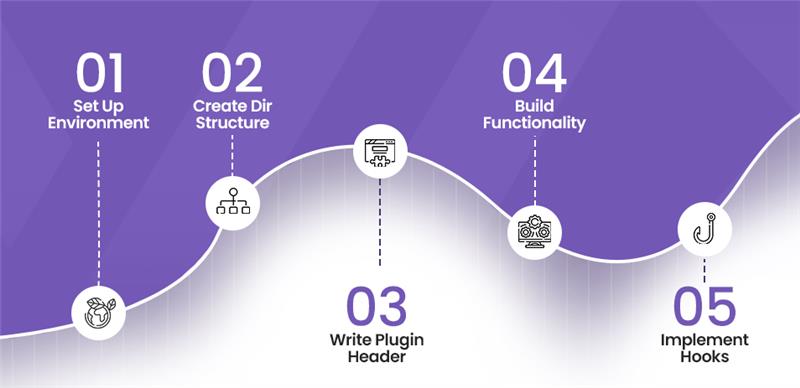
Set Up Your Development Environment
A robust development environment is the bedrock of efficient plugin development. It allows you to write, test, and debug your plugin code in a controlled setting, preventing issues on live sites.
Install a Local WordPress Environment
You’ll need a local server setup to run WordPress on your computer. Popular choices include:
- MAMP (Mac, Apache, MySQL, PHP): User-friendly for macOS.
- XAMPP (Cross-platform, Apache, MySQL, PHP, Perl): Great for Windows and Linux.
- Local by Flywheel: A free and incredibly user-friendly tool for local WordPress development that offers features like instant site creation, SSL, and blueprints. Choose one and install a fresh WordPress instance within it.
Install a Code Editor
A good code editor significantly boosts productivity. VS Code (Visual Studio Code) is highly recommended due to its extensive plugin ecosystem and powerful features.
Install VS Code Extensions (if using VS Code)
- PHP Intelephense: Provides advanced code intelligence for PHP, including autocomplete, definitions, and error checking.
- WordPress Snippets: Offers pre-built code snippets for common WordPress functions, speeding up development.
- PHP Debug: Essential for step-through debugging.
Configure Xdebug in php.ini
For effective debugging, you’ll need Xdebug configured. Locate your PHP’s php.ini file (location varies depending on your local environment tool) and add or uncomment the following lines. Note that port 9003 is common for Xdebug 3.
Ini, TOML

After modifying php.ini, restart your local server to apply the changes.
Create the Plugin Directory Structure
WordPress plugins require a specific, organized directory structure to function correctly and for better maintainability. Navigate to your local WordPress installation’s wp-content/plugins/ directory and create a new folder for your plugin. For this, let’s call it my-plugin. Inside my-plugin, establish the following organization:
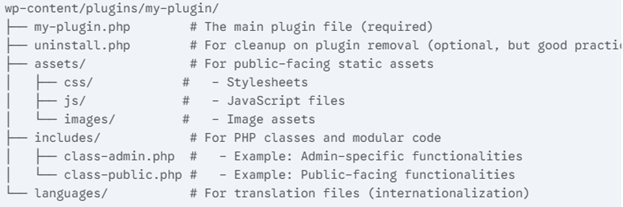
This structure keeps your code modular, separates concerns, and makes it easier to understand and work with your plugin.
Write the Plugin Header
Every WordPress plugin absolutely requires a standard header in its main PHP file. It provides WordPress with crucial metadata about your plugin, allowing it to be recognized and displayed in the WordPress admin area’s Plugins list. Open my-plugin.php and add the following:
PHP
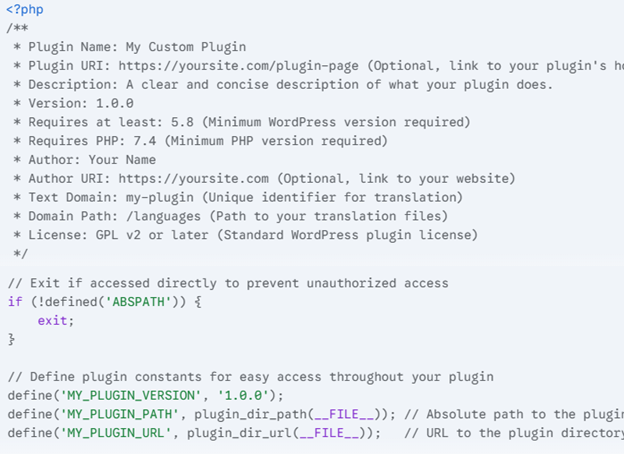
The if (!defined(‘ABSPATH’)) { exit; } line is a crucial security measure that prevents direct access to your plugin file. It also ensures that they are executed only within the WordPress environment. Defining constants like MY_PLUGIN_VERSION, MY_PLUGIN_PATH, and MY_PLUGIN_URL makes your code more robust and flexible.
Build Basic Functionality (Class-Based Approach)
For professional and scalable plugins, a class-based approach utilizing the singleton pattern is highly recommended. It ensures that only one instance of your plugin’s main class runs at any given time, preventing conflicts and managing resources efficiently.
Inside your my-plugin.php file, after the header and constant definitions, add the following structure:
PHP
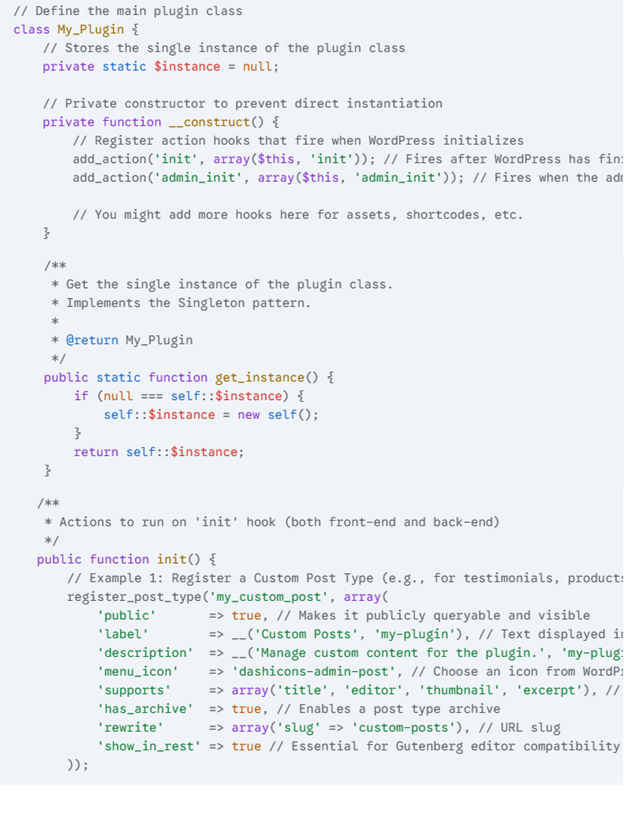
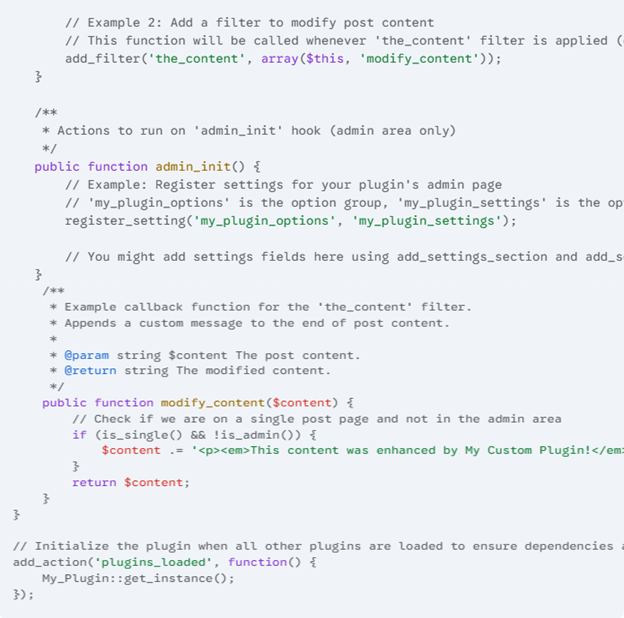
This structure provides a clean separation of concerns and organizes your plugin’s logic within methods. The init method is ideal for registering post types, taxonomies, shortcodes, and other public-facing setups. On the other hand, admin_init is perfect for admin-specific functionalities like settings pages.
Implement Activation and Deactivation Hooks
Proper activation and deactivation hooks are vital for managing your plugin’s lifecycle. They allow setting up necessary components when they are enabled and clean up gracefully when they are disabled or deleted. It prevents leftover data or broken functionalities.
Add the following code to the my-plugin.php file, typically after your main plugin class definition:
PHP
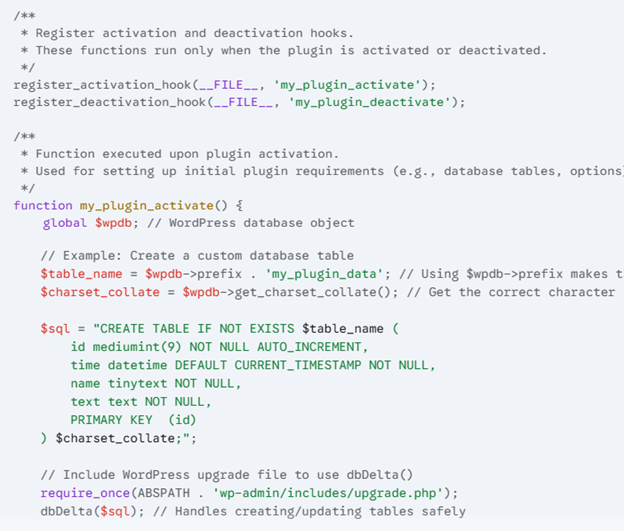
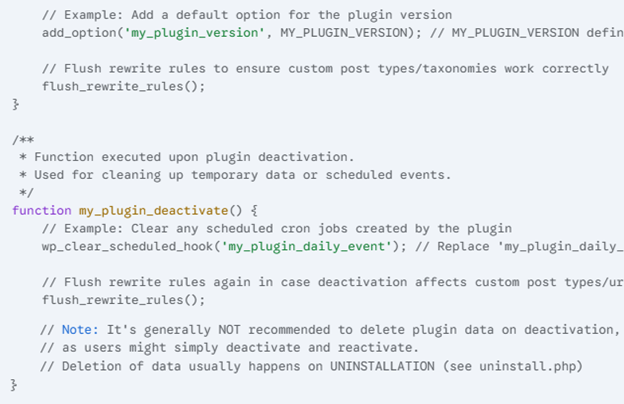
The dbDelta() function is crucial for creating and updating database tables safely, as it intelligently compares existing tables with your defined schema. flush_rewrite_rules() is essential whenever you register or unregister custom post types or taxonomies to ensure permalinks work correctly.
Bonus Tips from Expert Developers
Developing robust WordPress plugins goes beyond basic functionality. Here are critical insights from seasoned WordPress plugin developers to ensure your solutions are secure, efficient, and user-friendly.
Always Sanitize and Escape Data
Security is paramount. When dealing with any data that comes from a user (e.g., form input) or is displayed to a user, you must sanitize input and escape output. Failing to do so opens your plugin and entire website to severe security vulnerabilities like Cross-Site Scripting (XSS) and SQL Injection attacks.
Consider the following insecure PHP statement:
echo $my_custom_variable;
If $my_custom_variable contains malicious JavaScript, it will execute in the user’s browser. Instead, always use WordPress’s built-in security functions. For HTML output, use esc_html():
echo esc_html( $my_custom_variable );
The esc_html() function, as its name suggests, escapes all HTML and JavaScript code in your variable, making it safe for display. For other data types, refer to the WordPress Codex for Data Validation and Sanitization. Functions like sanitize_text_field(), wp_kses_post(), and absint() are indispensable.
Use WPDB Whenever Possible
When your plugin needs to perform custom CRUD (Create, Read, Update, Delete) operations with the WordPress database, it is strongly advised to use the WordPress database abstraction class, $wpdb.
The primary advantages of using $wpdb are:
- Security: $wpdb provides built-in methods to protect your queries from common database hacks, most notably prepare(). This method automatically handles SQL escaping for you, safeguarding against SQL injection. $wpdb->query( $wpdb->prepare( “SELECT * FROM {$wpdb->prefix}my_table WHERE id = %d”, $id ) );
- Compatibility: $wpdb abstracts away database-specific differences, ensuring your queries work across various MySQL versions that WordPress supports.
- Convenience: It offers a wide range of helper methods for common database tasks. It saves significant development time when writing raw SQL or custom security measures.
Always Consider Internationalization (i18n)
Develop your plugin in a way that is easy to translate into other languages. Internationalization, or i18n, is a crucial best practice, especially if you plan to share it publicly. It makes your plugin accessible to a global audience.
For example, a “Save” button hardcoded like this wouldn’t support i18n:
<button id=”exampleButton”>Save</button>
Instead, it must be wrapped in a translation function, which will look up the text in a translation file based on the site’s language:
<button id=”exampleButton”><?php _e( ‘Save’, ‘text_domain’ ); ?></button>
Here, _e() is for echoing text, and __() is for returning text. ‘text_domain’ should match the “Text Domain” defined in your plugin header. Follow the official WordPress Internationalization documentation for comprehensive guidance.
Prefix Functions and Add a Namespace to Class
One of the most common pitfalls for new plugin developers is naming collisions. If two plugins define a function or class with the exact same name, it will result in a fatal PHP error, crashing the website.
To solve this problem, always prefix your functions, classes, and constants with a unique identifier related to your plugin. For example, instead of a generic get_data(), you can change it to my_plugin_get_data(). Your prefix should ideally match your plugin’s directory name or text domain. Additionally, always wrap your functions with an if ( ! function_exists() ) check:
PHP

It not only prevents naming collisions but also allows themes or child themes to override your function if needed, providing greater flexibility. For larger, more complex plugins, consider using PHP Namespaces to avoid class name collisions, though function prefixing is often sufficient.
Final Thoughts and Next Steps
Custom WordPress plugin development is an incredibly rewarding endeavor that empowers you to tailor WordPress precisely to any need. While this guide provides a solid foundation, the journey of plugin development is one of continuous learning. Address challenges in optimizing complex queries, hardening security against threats, or integrating with external APIs that speak a different language.
Don’t let these technical obstacles become roadblocks. Embrace them as opportunities to deepen your expertise. For complex scenarios or time limitations, remember that professional help is available. Whether you need assistance with intricate database architecture, robust security implementations, or bespoke API integrations, WPKoders is willing to guide. Consulting professional WordPress plugin developers can transform potential frustrations into effective solutions. Your custom plugin is a powerful asset; ensure its perfection.